Design your own shoe assignment pdf
Activity from TeachEngineering.org was contributed by Worcester Polytechnic Institute’s Martha Cyr and WEPAN, the Women in Engineering ProActive Network. Click HERE for a high-school-level sneaker design activity that includes engineering career exploration from Discovery Education for Manufacture Your Future.
Summary
Students in upper elementary/early middle school learn about the engineering basics involved in high-performance footwear by following the design process to build prototype sneakers from a variety of materials to meet such design requirements as good traction or deep cushioning. They learn how the sole provides support, cushioning, and traction. There also may be some fashion-based functions, including cool colors or added height.
Grade Level: 5th to 7th grade Time: 85 minutes, over two days. Part 1, 40 minutes; Part 2, 45 minutes.
Team size: 3 people
Cost: $5
Engineering Connection
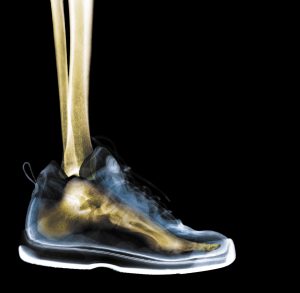
Biomedical engineers are involved in the design of sneakers. While it is important for sneakers to look stylish to appeal to consumers, they also must function properly. Many factors must be considered when designing sneakers, such as who will wear them (male, female, child) and the types of activities for which they’ll be used. Those indicate what shoe characteristics are most important for the design, such as traction, cushioning, and height.
Learning Objectives
After this activity, students should be able to:
- Analyze a product’s components and function.
- Recognize a design need or engineering challenge.
- Develop, sketch, and discuss possible solutions and select one.
- Select appropriate materials for a design solution.
- Construct a working model using a variety of materials.
- Use, evaluate and suggest ways to improve a product.
Learning standards
Next Generation Science Standards [Grades 3-5]
- Define a simple design problem reflecting a need or a want that includes specified criteria for success and constraints on materials, time, or cost.
- Generate and compare multiple possible solutions to a problem based on how well each is likely to meet the criteria and constraints of the problem.
Common Core State Mathematics Standards [Grade 4]
- Use the four operations to solve word problems involving distances, intervals of time, liquid volumes, masses of objects, and money, including problems involving simple fractions or decimals, and problems that require expressing measurements given in a larger unit in terms of a smaller unit. Represent measurement quantities using diagrams such as number line diagrams that feature a measurement scale.
International Technology and Engineering Educators Association: Technology [Grades 6-8]
- Test and evaluate the design in relation to pre-established requirements, such as criteria and constraints, and refine as needed.
Materials
Each group needs:
- An assortment of materials that provide height, cushioning, flexibility and/or traction for shoe prototype construction, such as sponges, bubble wrap packing material, foam, and rubber gloves; see suggestions in Worksheet A: Materials and Properties; feel free to add or substitute items
- 2 fabric base forms, cut to the template in Worksheet D: Pattern for Cutting Fabric Base Forms.
- Fabrication tools, such as scissors, twine, glue, tape
- Worksheet A: Materials and Properties, two per group. Click HERE for PDF.
- Worksheet B: Design Specifications for the Sneaker Click HERE for PDF.
- Worksheet C: Materials and Costs, two per group. Click HERE for PDF.
Introduction/Motivation
Sneakers are designed for an assortment of uses. Each application has specific characteristics that must be taken into account before manufacturing. What are your ideas for a sneaker that has never been made before?
Today, you will define specific characteristics for your sneaker, select suitable materials, and create a prototype, just as engineers do.
Vocabulary/Definitions
- cushioning: Providing a softening effect to forces.
- prototype: A functional early design of a product that is intended for testing.
- stiffness: Resistance to being flexed.
- traction: Ability to slide a load across a surface.
Procedure
Designing today’s sneakers is an engineering science that combines physics, biomechanics, and materials science. The engineering designs take advantage of a wide range materials and creative structural concepts to provide durability, comfort, cushioning, and stability. Good designs also consider the characteristics of various foot types (female, male, child) since each has typical shapes and proportions. For example, women’s feet are usually narrower at the heel, wider at the toe, and with higher arches than men’s feet. The inside layout of a well-designed sneaker takes these physical differences into account. Another important consideration is the activity application. Some sports require shoes with high flexibility, others need maximum cushioning or high traction.
Before the Activity
- Gather materials for sneaker prototype construction, as suggested on Worksheet A: Materials and Properties.
- Use Worksheet D: Pattern for Cutting Fabric Base Forms to cut out enough fabric shoe bases to provide two for each student group, plus a few extras in case of mistakes. Note: Each group will construct two matching sneaker prototypes.
- Make copies of Worksheets A, B and C.
With the Students
Part 1: Modeling and Building a Sneaker
- As a class, discuss the following: Think about the characteristics of your shoes. What would you like to be different about them? What would it take to create a sneaker with that new property or component? What materials do you know about that could be used?
- Divide the class into groups of three or four students each. Give each group Worksheet B: Design Specifications for the Sneaker to complete.
- Hand out two copies of Worksheet A: Materials and Properties to each group. Discuss the properties of each material (springy, soft, rigid, sticky, rough, etc.).
- Hand out two copies of Worksheet C: Materials and Costs to each group. Costs are assigned to each item. The designed pair of sneakers must be within budget, limiting options and forcing engineering trade-off decisions. [To save paper, write the costs on the whiteboard or make one large poster.]
- Distribute two fabric bases plus a bag that includes the materials available for construction of the prototype sneakers. Students can cut or shape materials as desired. Alternatively, set up a “store” at which students can purchase the materials they want by completing and submitting Worksheet C.
- Once students select the materials that they feel will work best (meet their design criteria) for their prototype sneakers, have them use glue and tape to assemble the prototypes.
- Allow the prototypes time to dry.
Part 2: Evaluating and Improving the Design
- Distribute the dry prototypes to the original designers and two lengths of twine for tying on the prototypes.
- If time permits, have groups present their designs to the class, explaining what worked well and how they would improve their prototypes. Evaluate each design according to the criteria in #3, below. If time is short, enlist the help of another adult to evaluate half of the groups.
- Use the following criteria to evaluate for design success, rating on a 1-3 scale:
- Height: Measure the student’s height with and without the sneakers on.
- Traction: Slide around the floor with and without the sneakers on.
- Cushioning: Jump up and down with and without the sneakers on.
- Stiffness: Bend and twist prototype sneakers compared to store-bought sneakers.
- If students suggested any additional design criteria, have the group discuss and decide what would be appropriate tests for design success.
- Conclude with a class discussion of the following: Compare your sneaker prototypes to some of the sneakers that students are wearing. How do the materials you used compare to the ones in the store-bought sneakers? Are the ideas you have created realistic? What activities are best suited to your designs?
Attachments
Safety Issues
- Cover desks and floor surfaces to protect them from glue during construction and testing, or set up a special “test area.”
- These sneakers are only prototypes and should not be used for actual wear after the adult-supervised testing.
Investigating Questions
- Which material properties help the sneaker be comfortable when you apply strong forces or pressure to your feet? (The greatest comfort comes from materials that are cushioning [soft] and have the ability to “bounce back.”)
- Why is traction important on a sneaker? (Traction is created by friction between the base of the sneaker and the ground. Without traction, shoes slip, as if you were trying to move on an icy surface.)
- Why do the prices of sneakers vary so much? (Sneaker prices vary because they depend on material costs, marketing costs, manufacturing costs, and supply and demand pressures.)
Assessment
Post-Activity Assessment: Observe class participation in during the discussion about sneaker characteristics.
Activity Embedded Assessment: Evaluate design success during testing. Rate criteria using a 1-3 scale.
Post-Activity Assessment: Assign students to write descriptions of their sneaker designs, explaining the reasons for each feature and what activities they would be best suited for.
Activity Extensions
Have students create a list of other types of footwear. From this list, either discuss the importance of (or create a graph that shows) the same design criteria (height, stiffness, cushioning, traction) for each of these.
Activity Scaling
- For younger students, a companion activity – Sneaking Up on Sneakers – has them explore the types of shoes used for different sports.
- For upper grades, assign students to research specific materials and combinations of materials that are used to manufacture real sneakers
- For grades 9-12, this five class-period version of the shoe design activity from Discovery Education includes the various engineering disciplines involved in shoe design as well as a focus on 3-D computer modeling and the manufacturing process.
References and Additional Resources
Sneakers: From Start to Finish Samuel G. Woods, Gale Zucker (photographer). Book for 3rd to 5th grade readers.
The Making of a Pair of Sneakers. The Science Channel looks at shoe manufacturing from materials to testing. [YouTube 14:00]
The Engineering Behind Shoe Design. A University of Southern California site that illuminates the engineering of everyday things looks at the materials and design constraints, such as gait, in today’s athletic footwear.
How running shoes are made. Article traces history of athletic footwear from ancient Greece to modern times and includes overviews of design, materials, and manufacturing process. If the Shoe Fits, Design It. Article about a University of Massachusetts, Amherst, mechanical engineering student who designed sneakers. (2011) Step-by-Step Guide to Customizing Sneakers. Think automobile detailing for high-tops. Autodesk Sketchbook Pro – Shoe Design. Computer aided design of sports shoe. [YouTube 8:54] How to Make a Custom Running Shoe. Discovery Education [YouTube 5:00] How to Create A Casual Sports Shoe in icad 3D+. 3-D computer modeling. [YouTube 6:27] ConceptKicks. Artistic designs and cool shoes. The Secret Lab Where Nike Developed the Power-Lacing Shoe of Our Dreams. Wired, October 2016. Includes video with Nike innovator Tiffany Beers explaining HyperAdapt’s design. Contributors Martha Cyr
Supporting Program
Making the Connection, Women in Engineering Programs and Advocates Network (WEPAN)
© 2013 by Regents of the University of Colorado; original © 2001 WEPAN/Worcester Polytechnic Institute
Project funded by Lucent Technologies Foundation.
